Showing posts with label Parenting. Show all posts

Thursday 7 June 2018

Easy Eggless Sandwich Bread

Only he can understand the joy of baking a bread, who has got his hands dirty in the bread dough! 

Bread making is therapeutic. From the day MIL and I baked our first bread, each bread that turns out great gives us a feel good factor which is difficult to understand, unless you get your hands dirty!

Let me make an honest confession. Till now it was always my MIL who was kneading the dough. In her words, kneading dough is an activity she loves soooo much that she can even wake up at 3am and knead a dough! Now, can there be a better thing than this for a lazy daughter in law like me? Yes, I am counting my blessings!

However, I wanted to do everything by myself this time around. We hadn't baked the sandwich bread so far. Mr. Hubby insisted we bake our own sandwich bread, since commercially available breads have chemicals. So, I got on to the task. 

Since I had to use the bread to prepare grilled sandwiches, I did keep a good share of all purpose flour, in addition to my favourite wholewheat chakki wala Punjabi Atta from Sion. The bread came out so well that I was beaming with pride!

Try it out and I am sure you too will stop buying bread from outside.

Ingredients

Wholewheat flour/Atta - 1 Cup
All purpose flour/Maida - 1 1/2 Cup
Instant dry yeast - 1 tbsp
Grain Sugar - 2 tbsp
Warm Milk - 1 Cup
Salt - 3/4 tsp
Water - 3-4 tbsp
Ghee/Butter - 1 tbsp for dough + 1 tbsp for greasing tin and brushing the bread

Method

1. In a clean bowl, take the sugar and instant dry yeast. Mix well.

2. Add 2-3 tbsp warm water. Mix well. Cover with a plate and keep aside undisturbed for 10 minutes. 

3. After 10 minutes, you will see that the yeast has risen beautifully.

4. In a bowl/Paraat take the wholewheat flour, all purpose flour and salt. Mix well while it is still dry.

5. Add the activated yeast mixture and knead well to form a smooth dough. After few minutes of kneading the dough will begin to stick to your hands but do not fret and continue kneading. The dough will automatically leave your hands. However, in total you will have to knead for a good 5-7 minutes to get a good dough. Also, stretch and knead the dough for good results.

6. Add 1 tbsp ghee/soft butter to the dough and knead well to form a soft dough. 

7. Shape the dough into a smooth ball with all the folds tucked below.

8. Transfer to a greased bowl. Cover with a dry cloth and keep for proving in a warm place (I use my switched off microwave oven) for about an hour or till the dough doubles.


This is how the dough looked after an hour.

9. Punch the dough in the middle to knock off the air.

10. Dust some plain flour on a clean kitchen platform/chopping board (I used the same Paraat I had used to knead the dough). Start kneading the dough by stretching and folding. 


11. After 2 minutes of kneading, spread the dough in an oval shape.

12. From one end, start rolling the dough, with soft hands but give a tight fold so as to avoid gaps in the bread. 

13. Pinch and seal the last fold and seal the sides as well.

14. Transfer to a 8" greased loaf tin. Spread the dough to cover the corners and lightly even the surface.


15. Cover with a dry cloth and keep at a warm place for proving for 30-40 minutes.

This is how the dough looked after 2nd proving.

16. Bake in a pre-heated oven for 200 degree centigrade for 10 minutes.  Then lower the heat and bake a 180 degree centigrade for 20 minutes.

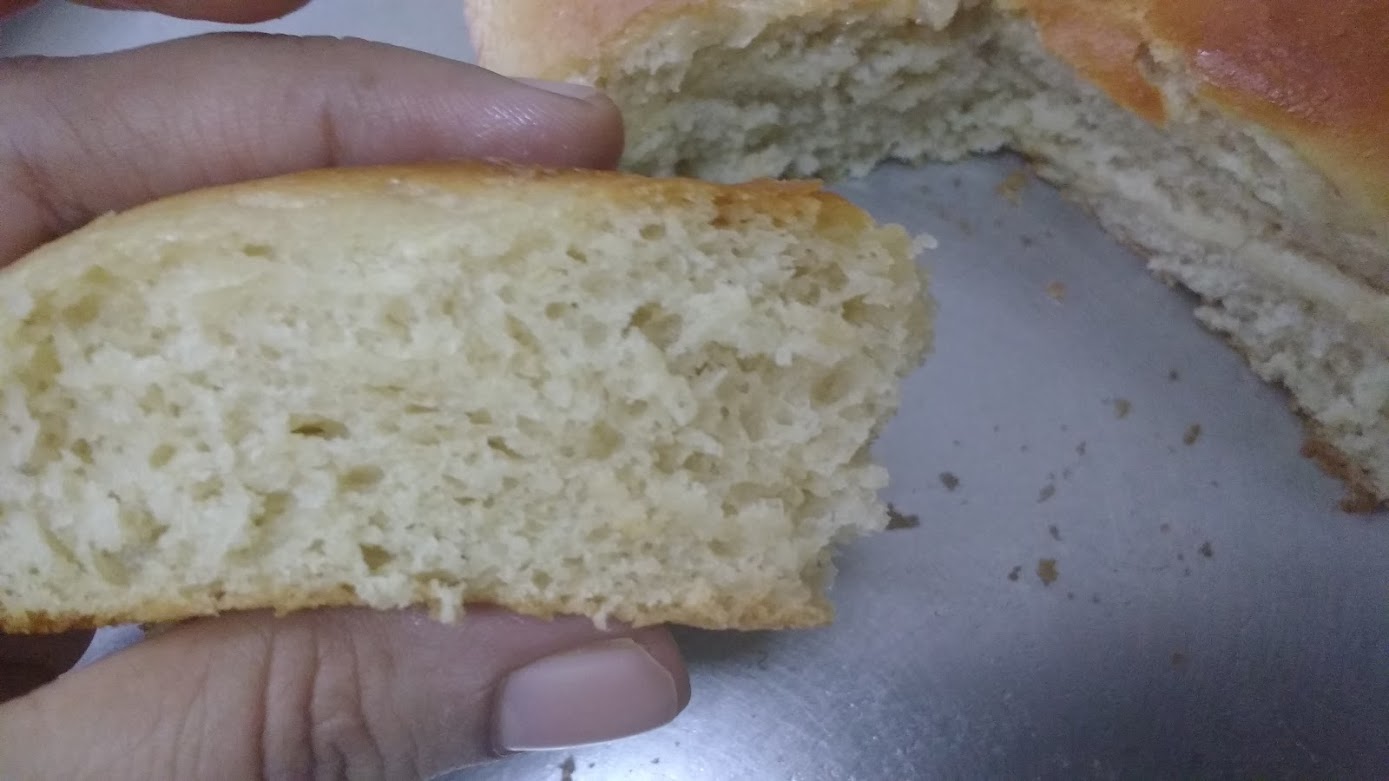
17. Brush some ghee/butter on the bread as soon as it is out of the oven. Cool for few minutes and demould. Cool on a wire rack to avoid perspiration at the base. Once the bread is cooled, cut into slices and enjoy as a sandwich or just with a slice of butter. 


Few Tips

1. As soon as you are done with the yeast, wrap the packet really tight and store in refrigerator.
2. Do not disturb the yeast bowl when kept for activation.
3. Keep the warm milk handy before you start kneading the bread. I once got the milk few minutes late and my bread did not take the wait very well.
4. If you don't find a warm place to prove the bread, your oven is your saviour. No matter how the weather is, I always keep the dough bowl for proving in the empty oven (switched off, obviously!). It gives a wonderful rise plus saves accidental disturbance to the bread, in case there is space constraint or you have children at home.
5. Cool the bread completely before you cut the slices. You will get much neat slices. If you try to cut slices while the bread is still warm, there will be a lot many crumbles. If you notice my pics, you will notice few crumbles. This is because my overenthusiastic MIL couldn't resist the aroma of the bread and enjoyed a slice before the bread could cool completely. 
6. The water used to activate the yeast should neither be too hot nor too cold else the yeast won't rise. It should just be warm enough so that your fingers can tolerate the warmth. 
7. Always use good quality yeast.
8. Never ever leave the bread in the loaf tin for cooling else the bread will have perspiration at the base. Always cool on a wire rack. 

Monday 28 May 2018

Easy Eggless Banana Walnut Bread


Top post on IndiBlogger, the biggest community of Indian Bloggers


Every time I go to a bakery, one thing that attracts me is Banana Walnut Bread and I always give in to the craving. A good book, a mug of coffee and a slice of Banana Walnut bread is all you need on a lazy evening. 

Thanks to motherhood, I am confined to the house these days. Few days ago, as the children went off to sleep late afternoon, I craved for that book-coffee-banana walnut bread moment. And so, the hunt began for the easy eggless recipe. 

Since I baked this bread late at night, I got to enjoy it only the next morning. I then realised that it makes for an excellent breakfast on the go. Unlike the original recipe, I used 100% wholewheat flour and was very impressed by the outcome. Also, I suggest vanilla essence if you don't like the aroma of ripe eggs (Mr. Hubby doesn't!)

The bread lasts 2-3 days if stored in an airtight container, but I can assure you it turns out to be so yum that it will get finished in a day!

Ingredients
Ripe Banana - 2 No.
Walnuts - 1/4 Cup, chopped
Castor Sugar - 5 tbsp
Melted Butter (I used salted) - 1/4 Cup
Vanilla Essence - 1 tsp (optional)
Wholewheat Flour/Atta - 3/4 Cup
Baking Soda - 3/4 tsp
Warm milk - 1/4 Cup or as required

Method

1. In a blender jar, take the banana pieces and castor sugar and blend together into a fine paste.


2. In a mixing bowl, take the melted butter. Add the mashed banana-sugar mixture, vanilla essence and beat well into a smooth and light mixture. Wet ingredients are ready.


3. Sieve together the wholewheat flour and baking soda. Dry ingredients are ready.


4. Add the dry ingredients to the wet ingredients and fold gently to mix the ingredients. Do not over mix.


5. Add the chopped walnuts and fold slightly.

6. Transfer the batter to a greased and dusted loaf tin and tap the tin once or twice to let the batter spread evenly.


7. Bake in a pre-heated oven at 180 degree centigrade for 35 minutes or until a knife comes out clean.

8. Cool for 5-10 minutes. Then loosen the sides using a knife and demould.


9. Let the bread cool for 10-15 minutes. Then, slice and serve at breakfast or tea time.


Look how soft it is...


Bon Appetit!

Saturday 12 May 2018

Easy Eggless Flower Bread

This flower bread happened by chance! I was desperate to bake my own bread. However, I had not yet purchased a loaf tin, nor did I have a big baking tray (haven't yet found a round one for my microwave). But, when there is a will there is a way. So, we baked it in our flower shaped aluminium cake tin!

With this bread, I resumed baking after 14 years. Read more about it here.

This bread is ideal for tea time. Blame it on our excitement, we enjoyed it with a generous layer of butter and it vanished from the table in few minutes! Despite all the hard work, all I got of the bread was one petal. But that also proves the bread was indeed yum.

Well, without anymore bak bak, let me get onto the recipe.

Ingredients (Made a six petal flower bread)
All purpose flour/Maida - 1 Cup 
Instant Dry Yeast - 1 tsp
Sugar - 1 tsp
Salt - 3/4 tsp
Lukewarm milk - 1/2 Cup
Lukewarm water - 1/2 Cup
Clarified butter/Desi Ghee - 1 tbsp + 1/2 tbsp for brushing
Milk - 2 tbsp, for milkwash

Method 

1. In a bowl, take sugar, yeast and add lukewarm water. Cover and rest for 10 minutes for the yeast to activate. Do not move or uncover the bowl while resting. Also, the water should be lukewarm. Too hot or cold water won't activate the yeast and the bread won't rise.

After 10 minutes, the yeast rose and looked like this. 

2. In a separate vessel (since I don't have a big working board, my humble Paraat which I used to knead the chapati dough came handy) take the maida.

3. Add the salt and mix well.

4. Knead a soft dough using lukewarm milk. Preparing the dough is an important step and thankfully, my MIL volunteers for the job and completes it to perfection. She knead the dough for a good 7-8 minutes. The dough started sticking but she continued to knead and we eventually got a soft dough.

5. Add 1 tbsp desi ghee and knead the dough well so that the ghee gets absorbed. This gives a very soft texture to the bread. In fact, we do this even with our chapati dough. Make the dough into a ball. 

6. Cover the dough with a moist cloth and keep in a warm place undisturbed for 2 hours to prove. 

Our dough doubled beautifully after 2 hours.

7. Take the dough in the Paraat and knock off the excess air. 

8. Grease the tin.

9. Put the dough in the greased tin and make small cuts with scissors to give the shape of petals. 


10. Cover with a damp cloth and keep for proving for another 30 minutes.

11. Give milk wash.

12. Bake in a preheated oven at 200 degrees Celsius for 20 minutes.

13. Loosen the sides with a knife and smear ghee while the bread is still hot.


14. Cool for 15 minutes. Cut into petals and enjoy with butter!